
HOW TO MEASURE FOR A DIVIDE & CONQUER FORM
N-E Measure from the tip of the nose to the corner of the eye
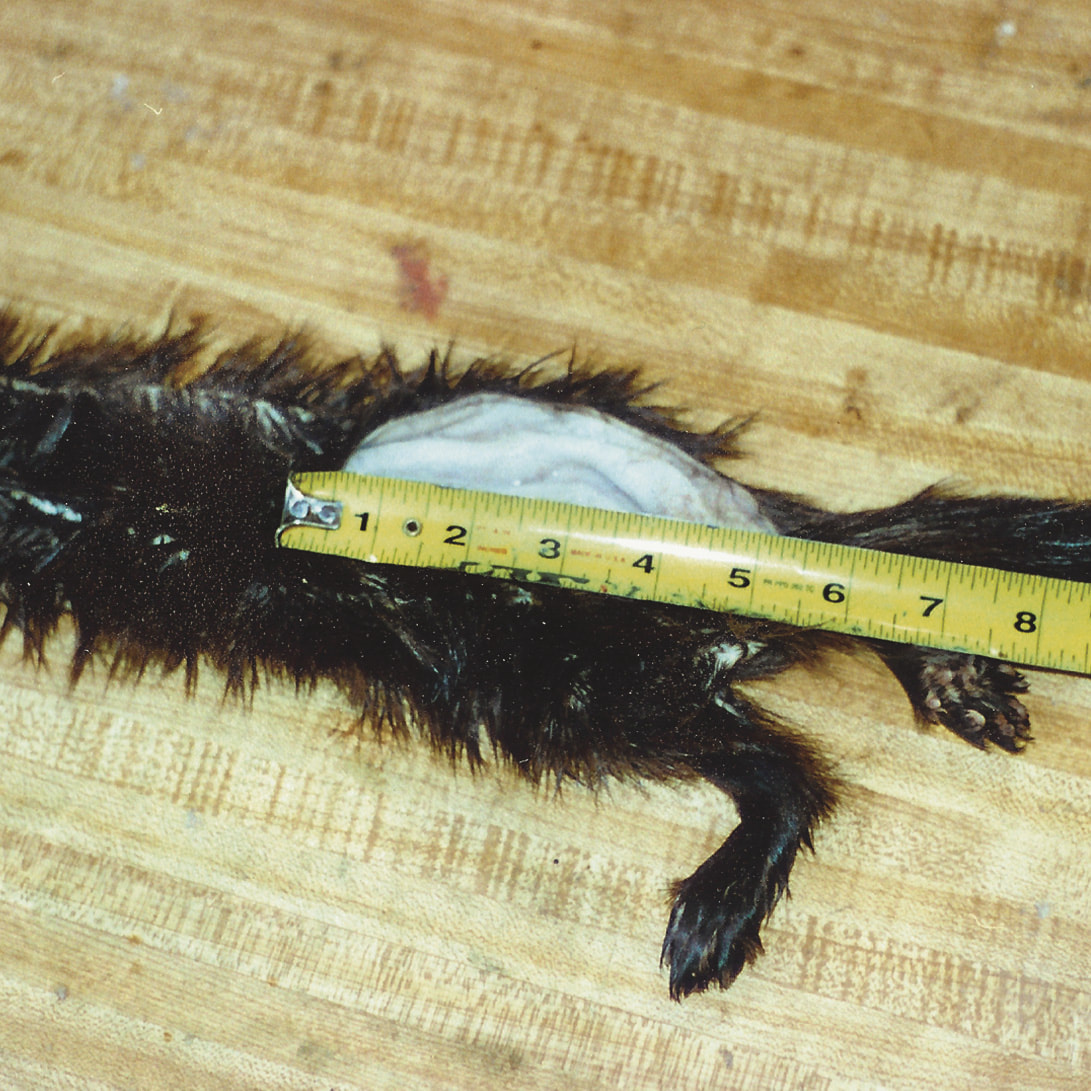
N-T Measure from the tip of the nose to tail
CIR Measure the distance around the midsection
N-T Measure from the tip of the nose to tail
CIR Measure the distance around the midsection

HOW TO USE a DIVIDE & CONQUER FORM
Follow these simple steps for using our patented forms.
STEP 1
Any number of incisions can be used with these forms. A short dorsal or a straight belly cut is our preferred method. However, a cased (trapper style) can be utilized as well.
STEP 2
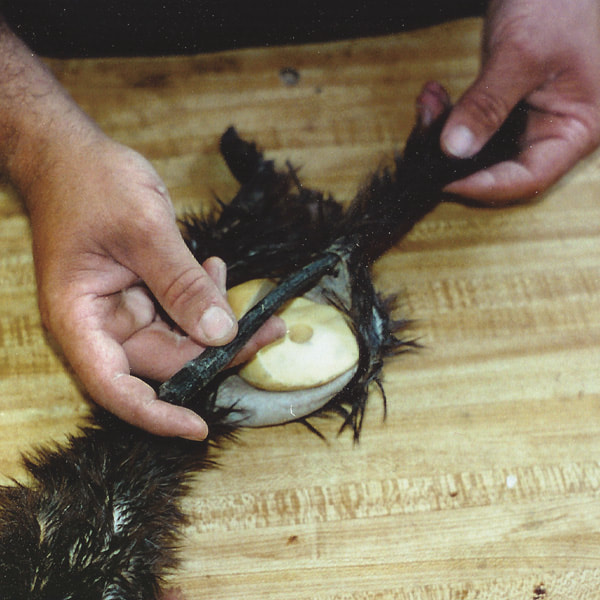
After the skin has been tanned, the mounting process begins with inserting the legs and tail into the skin. The trickiest part of this step is to get each leg form into the appropriate leg.
STEP 3
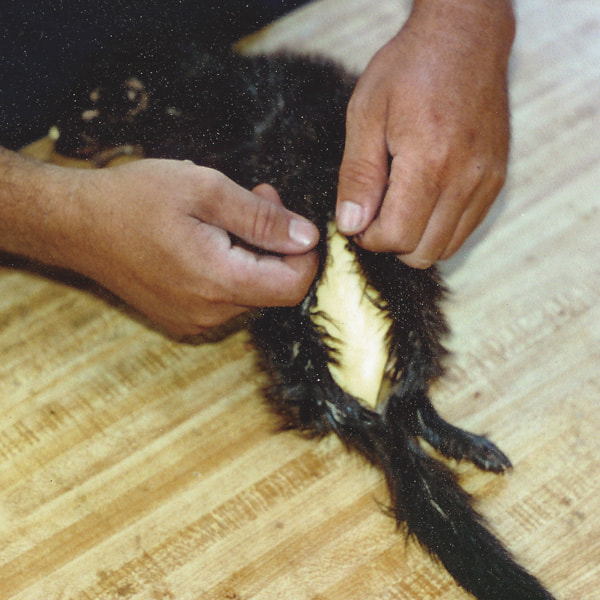
After legs have been inserted, slide the main body into the skin. At this point, you’ll need to lock in the front legs. If you have used a belly incision, place a drywall screw into the front legs to secure them. If a short dorsal incision was used, make a 1/2 inch incision in the shoulder area and insert the screw. You can super glue this small incision back together. Lastly, secure the back legs into place.
STEP 4
As you can see, your sewing time will be cut by at least 50%. And, a shorter incision means a cleaner seam. If you used a belly incision, it will be completely hidden.
STEP 1
Any number of incisions can be used with these forms. A short dorsal or a straight belly cut is our preferred method. However, a cased (trapper style) can be utilized as well.
STEP 2
After the skin has been tanned, the mounting process begins with inserting the legs and tail into the skin. The trickiest part of this step is to get each leg form into the appropriate leg.
STEP 3
After legs have been inserted, slide the main body into the skin. At this point, you’ll need to lock in the front legs. If you have used a belly incision, place a drywall screw into the front legs to secure them. If a short dorsal incision was used, make a 1/2 inch incision in the shoulder area and insert the screw. You can super glue this small incision back together. Lastly, secure the back legs into place.
STEP 4
As you can see, your sewing time will be cut by at least 50%. And, a shorter incision means a cleaner seam. If you used a belly incision, it will be completely hidden.
STEP 1
|
STEP 2
|

STEP 3
|
STEP 4
|
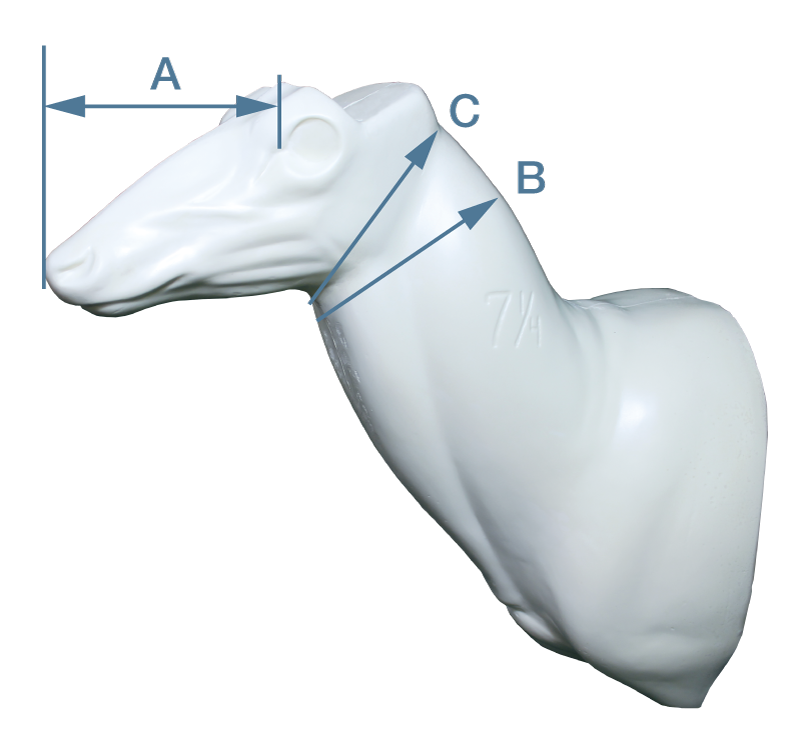
HOW TO MEASURE YOUR DEER FOR AN OZARK WOODS FORM.
|
A Measure from the tip of the nose to the corner of the eye B Measure from the beginning of swell under chin about 2 - 3 inches from the small of the neck C Measure at the small of the neck |
|